I thought I’d have a go at making a ‘burger type’ soft roll, minus the sesame seed ‘cos I’ve run out!
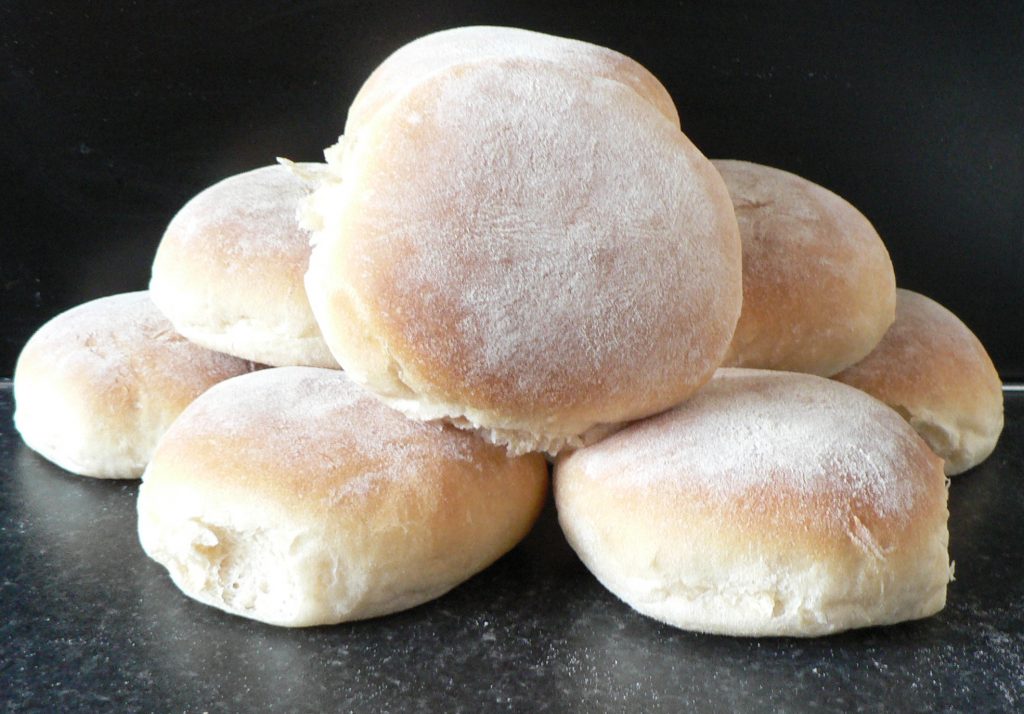
Time has moved on since I first made these rolls in June 2008. The recipe’s changed slightly. Rather than confuse things with a new article, I’ve amended the recipe below.
Ingredients for 9 large or 12 smaller rolls:
600g Strong Bread Flour
120ml Hot Water mixed with:
300ml Cold semi-skimmed milk (you want the total liquid to be about 35 – 37°C when you add it)
1½ teasp Salt
2 tablespoons Cooking Oil
1 sachet Fast Action Dried Yeast (7g)
Method
I make this using a Kenwood food mixer. But it’s easily amended to make it by hand.
I put the flour into the bowl, then chuck the salt in and mix it with a spoon. Then I add the yeast and mix it again. Next, I add the oil and water/milk and stir it with a spoon until the ingredients are roughly mixed together. This is for no other reason than to stop the flour splattering everywhere when I turn the mixer on!
I mix it on a low setting using the dough hook for five minutes then I give it a rest for a few minutes and then mix it again for another 5 minutes. I tip/scrape the dough onto a floured board and bring it together into a ball using as little flour as possible. Into the now empty bowl, I put about 1 teaspoon of oil, put the dough back in, and rub it with the oil. I cover the bowl with a tea towel and forget about it for an hour or so.
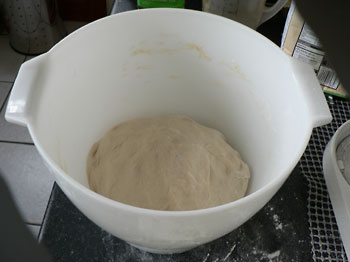
A word about the dough: This dough has a ratio of 70% water to flour which is higher than many ‘traditional’ recipes. It makes a lighter textured bread which most people nowadays prefer. You could make it by hand if you want to but be warned, this mix is very sticky! If you do make it by hand, persevere when you knead it and try not to add too much extra flour; just accept that your hands will be a sticky mess and get on with it. Knead it for a good 10 minutes until it is a nice ‘silky’ texture. Don’t try and cheat at this stage or it won’t be any good at all.
Rising the Dough:
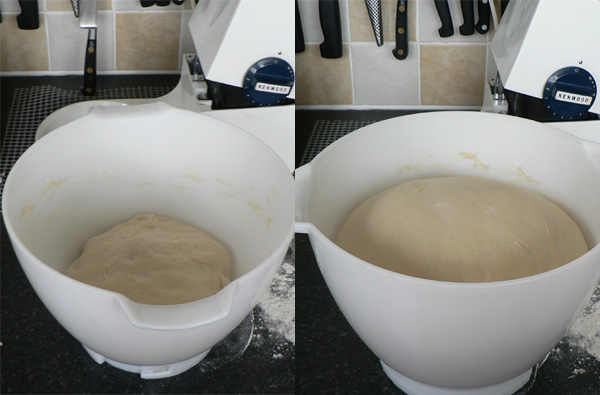
Recipes generally tell you to leave the dough in a warm place, an airing cupboard, or something similar, for about an hour, until doubled in size. It may take an hour. It may take longer. What I do is judge by the size, not time. Ideally, the temperature should be about 26°C but I generally just put it to one side in the warm kitchen. As long as it’s above 4°C the yeast will still be active; mind you, at that temperature you’d be starving by the time the bread rose and was baked!
When I say “doubled in size”, I mean doubled in size:
Shaping and proving the dough
Now for my favourite bit – just shove your fist into the middle of the dough. Yes, I mean it – just thump it in the middle. It’ll collapse making you wonder why you bothered leaving it to rise in the first place! It’s necessary, so just enjoy it!
Tip the whole lot onto a floured surface and work it around for 30 seconds or so, then shape it into a ball. Cut this into 12 even parts for small rolls, or nine for larger rolls for burgers. I flatten each piece out and fold the sides into the middle tensioning the under-side as I work around each piece. When the under-side is smooth and ‘tight’ I turn it over and push it down to make a flat disk with a smooth top.
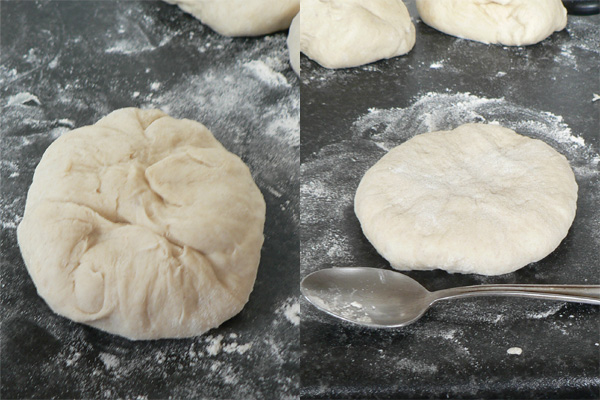
I then sieve some flour over the top. Alternatively, you could brush it with water and put sesame seeds, poppy seeds, or something similar on top.
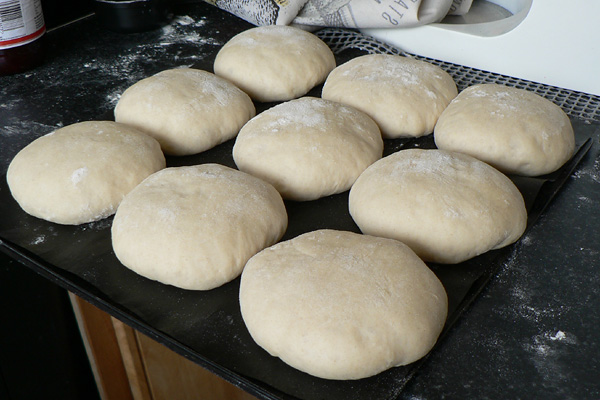
I leave the dough now to rise again. When it’s about half risen I put the oven on 180°C (160°C fan) to warm up. Many old recipes give a time for the dough to rise – say 20 minutes – what nonsense! Sometimes it’s fairly quick, other times it may be an hour or so. What we want is for it to nearly reach its full size – the bigger the better – as long as it doesn’t collapse! The pictured dough is of the smaller rolls after they’ve risen:
Cooking the bread
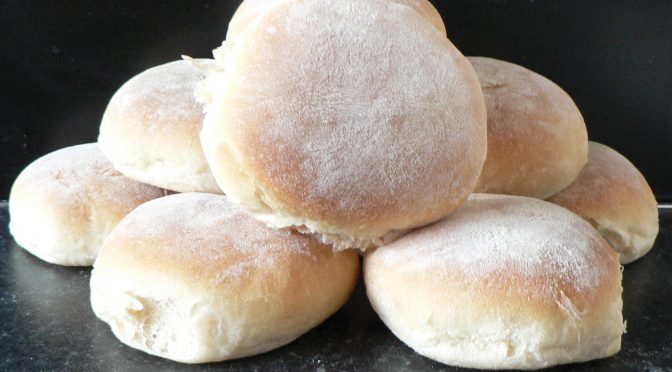
For a soft roll, I bake the bread at 180°C in a ‘non-fan’ oven; it works far better than a fan oven for soft rolls. I then cook them for 20 minutes and, if when I tap the bottom of the loaf it sounds hollow, it’s cooked. If you only have a fan oven, it’s hard to keep them really soft; it helps to cook them at a lower temperature, maybe 170°C or even 160°C, and to wrap them in a clean tea towel immediately after cooking.
These rolls are very light, have good keeping qualities, and freeze well.
For a crustier roll, have the oven at 220°C (200°C fan) and put a metal tray into the oven as it warms up. Immediately after you’ve put the bread rolls in to cook, put some water, say 150ml, onto the very hot tray to create a steamy atmosphere. Remove the water tray after 10 minutes.
The crustier rolls are best eaten on the day of cooking.
Can you make a loaf with this recipe
Yes, I think that you could.
Yes, I do all the time. I actually use all milk and make a 600g loaf, bake for 25min @ 160°C fan. Comes out lovely and soft.
OK thanks ?
I used this method cooked on 160 fan for 25 mins, not cooked in middle and stuck too baking tray.
You need to cook them until they sound hollow when tapped on the bottom. Ovens will vary; mine’s fine at the temps posted. I’d up the temp to 170°C if you make them again.
Hi, I have now made those rolls twice, they came out beautifully and are great for lunchboxes.
Thank you for the recipe.
Thank You. I’m pleased that you enjoyed them.
Hi Phil,
It’s been a while, life got involved !! Haha
Just thought I’d post a note..
I hope you are well and better than previously ..it’s nice to see the site is still doing well.
I posted some time ago about bacon and my ad hoc recipe. I have continued to use the same method and have refined it somewhat. Do you reckon I could use the bacon calculator amounts to cure a deboned leg to make a gammon? Would a week or 10 days be good enough to dry cure up to about 2 1/2 inch.
Getting back to bread..
These bread cakes remind me of the ones that were very popular in the Rotherham area where I grew up. When I was working there I used to get one filled with bacon, sausage, fried eggs, tomatoes and a few fried mushrooms….if memory serves they were about 6 or 7 inch diameter…..absolutely delicious.
Tek care o yersen owd lad and keep goin!
All the best
Neil
Thanks, I’m a lot better than before and am up and about.
There is no reason why you can’t use the calculator for a cure for gammon. As it’s a measured cure you can err on the side of caution regarding the number of days in cure. Get most of the cure on the exposed meat including in the cavity left by removing the bone.
As to the bread cakes (we’d call them baps or cobs in Leicestershire but to me cobs are crusty!) the ones I get in Sheffield are very similar. I like the oven-bottom cakes that you get ‘oop north’ as well.
Best regards
Phil
Hi Phil,
That really is great news mate, very happy to hear that.
Thanks for the confirmation, I did think it would be ok but thought I’d ask the professional!
I bought a leg section yesterday, I’m thinking it was a knee section as the joint that I removed was not a ball and socket as the hip would be but was the two hills and a valley type for want of a better description. The bone came out very easily. Final weight 3055g.
Strange how the ‘skin on’ numbers are lower when I would have thought it might actually have been higher, what’s the reason for that?
Anyway, I added all the salt, sugar and cure, rubbed well in and it’s now in a ziplock bag in the fridge. Maximum thickness between 2.5-3”. A week or 10 days with daily massages..I’m thinking more towards the 10. I also added my usual nutmeg, mace, white pepper, allspice, juniper, thyme and coriander.
Not sure this ended up in the ideal area, so my apologies for that.
Oven bottom cakes? Not heard of those Phil. I would also agree that cobs are crusty.
I will update as and when.
Have a great weekend mate.
Kindest regards
Neil
Go longer rather than shorter on the timing. You use less cure for skin-on because the skin only absorbs very little of the cure. HTH
Yes very helpful Phil, many thanks. How long would you leave it for? 2 weeks to be ont safe side? I am assuming there is no way to check that it’s fully cured other than cutting into the thickest part to see the colour.
Sorry, I missed this. 20 days curing won’t hurt. Others may say otherwise but it doesn’t hurt to be sure
Many thanks Phil, I really appreciate your advice.
Coming up to 2weeks this Friday.
Progress report next week.
Enjoy the rest of the week and have a great weekend.
Hi Phil,
Well it’s 3 weeks at the end of today and will take it out in the morning and give it a rinse.
With my bacon I normally just hang them in the fridge for a few days to equalize (I think that’s the term). How long would you recommend for this 3 kilo of gammon. I believe this amount of time isn’t as important as the curing time , correct.
Many thanks and have an enjoyable weekend.
Cheer
Neil
I’d give it at least a week.
Many thanks Phil, much appreciated!
Watch this space lol.
It smells fantastic!
These are beautiful and soft. I wrap them in a clean tea towel for an hour or so when they come in of the oven. I have used it for a loaf of bread too. Thank you very much for the recipe.
My pleasure.
Well I gave it just a week and it seems to be perfect!
I hung it in the fridge opened out and not tied back in the round.
After a week the skin had dried out somewhat and the meat had darkened a bit but overall it was nice and dry. Btw when washing the meat I didn’t scrub it completely clean of any remnant spices but left on a fair bit; which I do with my bacon also.
After the week I took it out and removed the hooks and then massaged it back into a round and tied it 4 or 5 times round.
When sliced it looked beautiful and pink inside. I sliced off 5 full gammon steaks. A good handful of off cut bits and a nice small piece which I rolled back up and tied and boiled that…which tasted phenomenal! I fried up the off cuts had made 2 breakfasts from them with some home produced eggs.
Thanks very much for your help Phil, very very much appreciated.
Here is the list of spices should anyone like to try. T=tablespoon t=teaspoon
Deboned weight of meat 3055g skin on.
Per the calculator for US curing.
Salt 68.13g
Sugar(dark brown) 30.55g
US pink cure 8.8g
Mace 4t
White pepper 2t
Thyme 1T
Nutmeg 1t
Allspice 1t
Coriander seed 1T
Juniper 40 dried berries
All ground up and rubbed well in. Placed in a ziplock and put in fridge for 23 days and massaged daily. Very little water came out of my piece.
Many thanks again Phil
All the best
Neil
Sorry for the delay in replying – I’m so glad it worked.
I’ve just made these using multiseed bread flour and oh my days they were the best rolls I’ve ever made, wish I could post a pic! Thanks so much for the recipe!
Thank You
Made the largest version first time round and they were great. Made the smaller ones during the week but didn’t have enough proving time so they came out a bit dense.. making the large ones again tonight and they are looking great.
I make up to the 420 livid weight but swap 30ml out for butter.
I am sorry that I was unable to reply to your comment within a reasonable time frame. I have been ill and on bed rest since the end of November. I’m glad that you enjoyed them. Using butter makes them even more tasty!
Hi. I noticed there was no sugar in this recipe. I thought it was needed to activate the yeast.
I am sorry that I was unable to reply to your comment earlier. The yeast will convert starch in the flour to sugar, to feed on, without adding more. For a full explanation see: https://theepsombakehouse.co.uk/do-you-need-to-add-sugar-to-your-bread-dough/
These bread rolls are amazing and I’ve tried a few recipe’s my family love these just like shop bought.10/10.
Thank you.
This is my favourite bread recipe I’ve tried so far!! I made the dough into lunch rolls rather than burger buns, and washed them with a bit of milk before baking. 10/10, absolutely perfect texture and taste for my preferences! Really appreciate the more in depth explanations on this blog post too, it helped a lot with getting it right. This recipe will absolutely become a regular in my kitchen
Thank you.